Contact Reports focus on communication methods like scripts and surveys, showing how they’ve been used and what responses they’ve received. Company administrators and Supervisors can generate Contact Reports which can be downloaded to search and analyse data for calls handled by the system at a later date.
Existing Contact Reports can also be loaded and edited as required, so you could generate the same report but with different dates, without having to input all the other settings again. See Edit Contact Reports.
Generate a Contact Report: #
Create a new Contact Report #
- Click Data → Contact Reports
- Click Add
- Enter a mandatory Name for the report
- If required enter a Description
- Select the Report Type either:
- Agent Scripts Report
- Survey Report
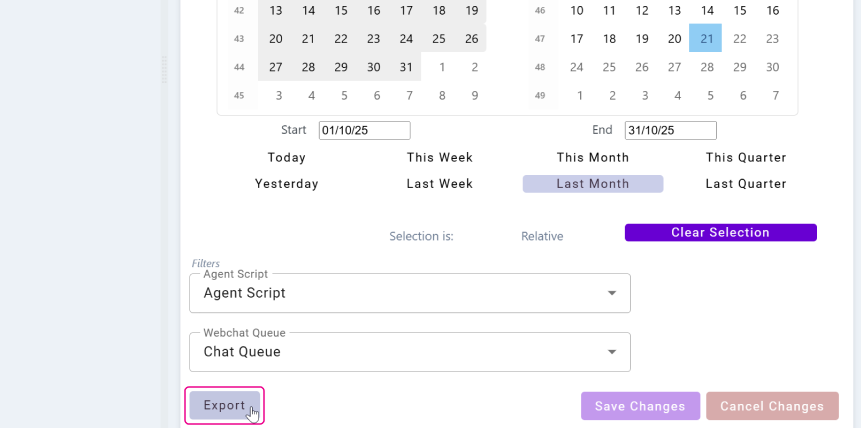
- Configure the time range the report looks at. There are multiple ways to do this:
- Configure days/weeks/months/quarters by selecting the relevant time period on the calendar
- Enter the required time range using the Start and End fields, dates can be entered in DD/MM/YY or DD/MM/YYYY format
- Select one of the pre-defined time range buttons (Today/This Week/Last Month etc)
- Select filters to refine the statistics to be included in the report
- Click Add
The report will created.
Export a Contact Report #
Exported Contact Reports they will be downloaded to your computer. The reports are usually exported as a CSV files however with Survey Reports it’s also possible to export the data as a PDF.
- Click Data → Contact Reports
- Either select a report or create a report by following the above instructions
- Click Export/Export PDF
The report will be downloaded to your computer.
| Note: When exporting a survey report file there is a limit of 1000 entries. If the report you are exporting contains more than 1000 entries you will need to select a shorter time period and export multiple reports. |